
Jade Plant Care: Expert Advice for Success
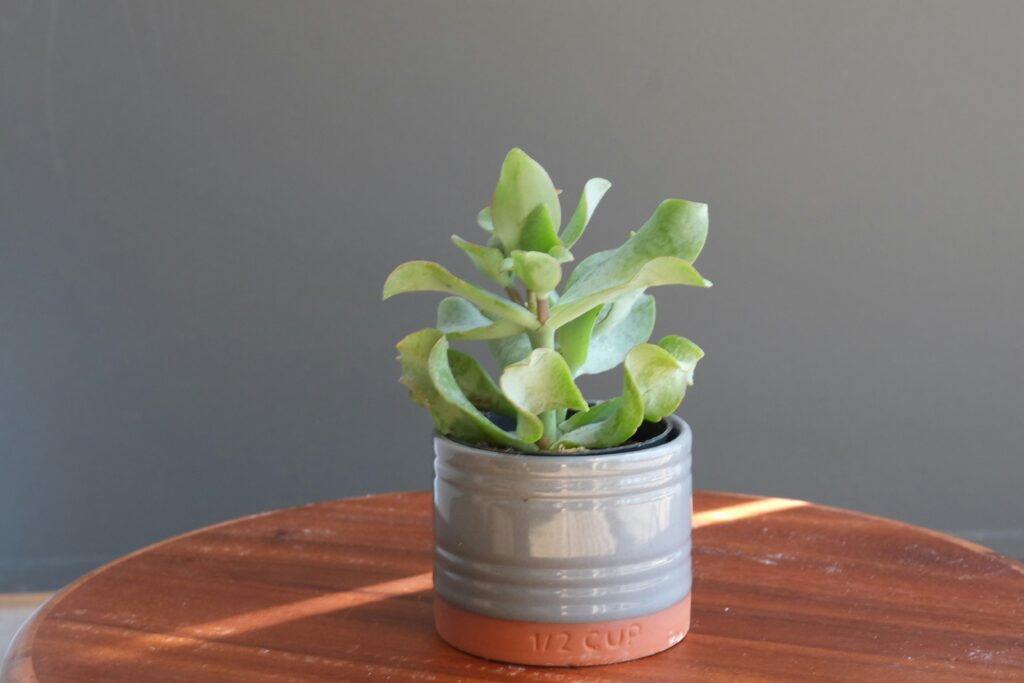
Jade Plant Care: Expert Advice for Success Introduction A jade plant is more than just a houseplant—it’s a symbol of luck, resilience, and easy care. With thick, shiny leaves and a tree-like shape, it adds beauty to any space. Plus, it’s one of the best low-maintenance plants for beginners! In this guide, you’ll learn how to take care of a jade plant indoors and outdoors, from the best jade plant soil to how often to water a jade plant. I’ll also cover how to propagate a jade plant, common mistakes to avoid, and whether it can grow in places like Florida. Let’s get started! Types of Jade Plants: Popular Varieties Not all jade plants look the same! Some have round leaves, while others have long, tube-like shapes. Some even turn golden in the sun. No matter which type you choose, they’re all easy to grow. Here are some of the most popular jade tree varieties: Crassula ovata (Classic Jade Plant) – The most common type. It has thick, green leaves and a strong, tree-like shape. Crassula ovata ‘Hummel’s Sunset’ (Golden Jade Plant) – Its leaves turn yellow, red, and green when exposed to bright light. Crassula arborescens (Silver Dollar Jade) – This one has round, silver-blue leaves that give it a unique look. Crassula ovata ‘Minima’ (Mini Jade Plant) – A smaller version of the classic jade plant—great for tiny pots. Crassula ovata ‘Gollum’ & ‘Hobbit’ – These have quirky, finger-like leaves that look like something from a fairy tale. Portulacaria afra (Elephant Bush) – Often mistaken for a jade plant, but it’s a different species. It has soft, small leaves and grows fast. Jade Plant Light Requirements: Does a Jade Plant Need Sun? Yes! Jade plants love the sun, but they don’t need to be in bright light all day. Think of them like sunbathers—they enjoy soaking up the rays but can get burned if exposed for too long. For indoor jade plants, place them near a sunny window, preferably south-facing. They need at least 4-6 hours of bright, indirect light to thrive. If the leaves start turning pale or stretching toward the light, your plant needs more sun. For outdoor jade plants, choose a spot with morning sun and afternoon shade. Too much harsh sunlight can scorch the leaves, leaving brown spots. If you’re in a hot climate, like Florida, some shade in the afternoon helps prevent overheating. Can a jade plant grow in low light? Yes, but it will grow much slower and may become leggy. If your home doesn’t get enough natural light, try using a grow light to keep your plant happy. How to Take Care of a Jade Plant (Indoor & Outdoor Tips) Taking care of a jade plant is easy once you know what it needs. Whether you keep it indoors or outdoors, this resilient succulent thrives with the right balance of light, water, and soil. Here’s how to help your jade plant grow strong and healthy. Jade Plant Indoor or Outdoor: Where Does It Grow Best? Jade plants can grow both indoors and outdoors, but their needs vary slightly. Indoor jade plants do well near bright, sunny windows. A south-facing window is ideal. If your home doesn’t get much natural light, a grow light can help. Outdoor jade plants thrive in warm climates. They prefer morning sun and afternoon shade to prevent leaf scorch. If temperatures drop below 50°F (10°C), bring them inside to avoid cold damage. Ideal Temperature and Humidity Jade plants love warmth! They prefer temperatures between 65-75°F (18-24°C) during the day and no lower than 50°F (10°C) at night. They also tolerate dry air, making them perfect for most homes. High humidity isn’t ideal, so if you live in a humid area, place your plant where air circulates well. Choosing the Right Pot and Drainage Good drainage is key to preventing root rot. Use a terracotta or ceramic pot with a drainage hole. These materials let moisture escape, keeping the soil from staying too wet. Avoid plastic pots, as they trap water and increase the risk of overwatering. How Often to Water a Jade Plant: Avoid Overwatering Overwatering is the biggest mistake people make. Jade plants store water in their thick leaves, so they don’t need frequent watering. Water only when the soil is completely dry. Stick your finger into the soil—if it feels dry 2 inches deep, it’s time to water. In summer, water every 2-3 weeks. In winter, water once a month. Always water deeply, but let excess drain out. Never let your jade plant sit in water. Signs of overwatering: Yellow, mushy leaves. Signs of underwatering: Wrinkled, shriveled leaves. Fertilizing for Healthy Growth Jade plants don’t need much fertilizer, but a little boost helps them grow. Use a balanced, liquid fertilizer diluted to half strength. Feed once in spring and once in summer. Skip fertilizing in fall and winter. The plant rests during this time. Pruning: How to Keep Your Jade Plant Bushy Pruning helps shape your jade plant and encourages bushy growth. Use clean scissors or pruning shears. Trim leggy stems or remove dead leaves. Pinch off new growth tips to promote branching. Pruning is best done in spring or early summer when the plant is actively growing. Jade Plant Soil: What’s the Best Mix? Getting the right soil for your jade plant is like picking the perfect mattress—too soft, and it suffocates; too hard, and it struggles to settle in. These hardy succulents love well-draining soil that keeps their roots happy and dry. If you get this part right, your jade tree will thrive with minimal fuss! Why Well-Draining Soil Matters Jade plants hate sitting in soggy soil. Their thick, water-storing leaves mean they don’t need constant moisture. If their roots stay wet for too long, they can rot—leading to a sad, mushy plant. The goal is to use soil that holds just enough moisture for hydration but drains quickly to prevent overwatering. The Best Store-Bought Soil for Jade Plants The easiest option?
Amazing Rubber Tree Care Hacks You Need!
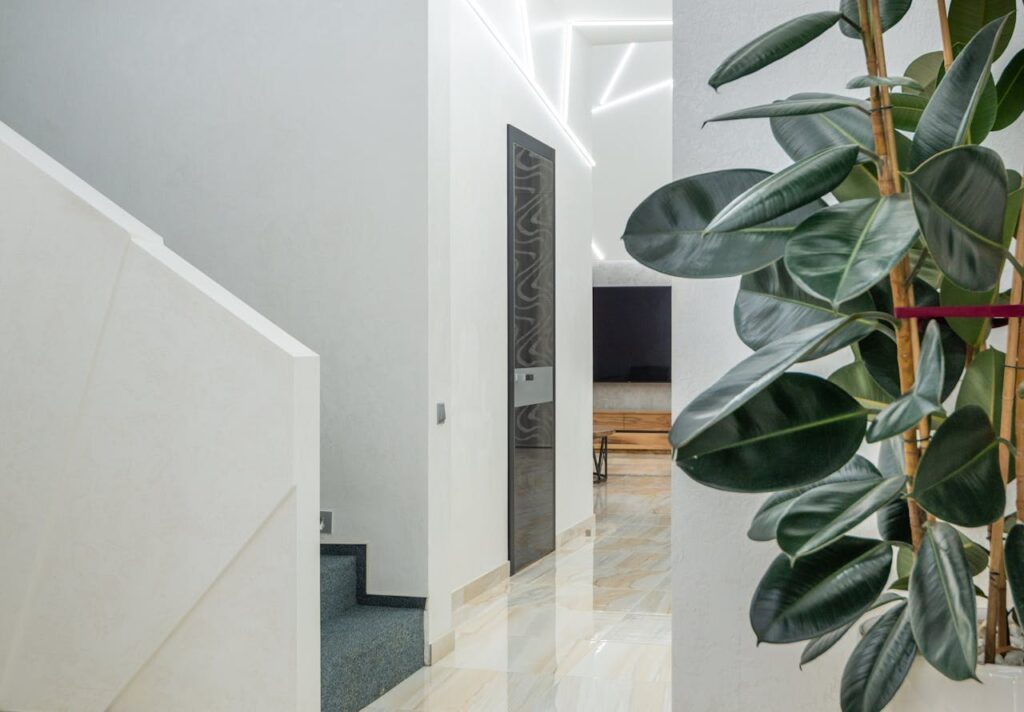
Amazing Rubber Tree Care Hacks You Need! Introduction Want an easy-care plant that looks amazing? Rubber tree care is simple, even for beginners! This plant cleans the air, grows fast, and adds a fresh touch to any room. With the right light, water, and a little pruning, it will thrive indoors. In this guide, I’ll show you how to keep your rubber plant happy and healthy. Let’s get started! Why Grow a Rubber Plant? There’s a reason so many plant lovers swear by the rubber plant. It’s low-maintenance, looks stunning, and actually helps clean the air! If you’ve been searching for a plant that thrives indoors without much fuss, this one’s a keeper. Rubber Plant Benefits Beyond its sleek, glossy leaves, the rubber tree works as a natural air purifier. It absorbs toxins and pumps out fresh oxygen, making your home feel fresher. Plus, it’s a fast grower, so you’ll get a lush, green space in no time. Rubber Plant Benefits in the Bedroom Want better sleep? Adding a rubber plant in the bedroom can help. It increases humidity, which keeps your skin from drying out overnight. It also filters out airborne toxins, creating a cleaner space to rest. Rubber Plant Disadvantages No plant is perfect. Rubber plants are toxic to pets, so keep them out of reach if you have curious cats or dogs. They also need occasional pruning to keep their shape. And if they don’t get the right care, they may drop leaves—but don’t worry, we’ll cover how to fix that! Essential Rubber Tree Care Indoors Taking care of a rubber plant is easier than you think. Give it the right light, water, and warmth, and it will reward you with big, glossy leaves and steady growth. Here’s what you need to know to keep your plant happy. Light Needs Rubber plants love bright, indirect light. A spot near a sunny window with sheer curtains is perfect. They can tolerate medium light, but growth slows down. Avoid direct sun—it can scorch the leaves. Watering Schedule Watering is simple: wait until the top inch of soil is dry before giving your plant a drink. Overwatering can lead to root rot, so if you’re unsure, it’s better to underwater than overdo it. If the leaves start dropping or turning yellow, check your watering habits. Humidity & Temperature These plants love warmth! Keep them in temperatures between 65-80°F (18-27°C) and away from cold drafts. While they adapt well to indoor conditions, they enjoy a bit of humidity. A light misting or a pebble tray with water can help, especially in dry climates. Choosing the Right Soil & Pot for Your Rubber Plant Getting the right soil and pot for your rubber plant is like picking the perfect home—it needs to be cozy, breathable, and just the right fit! If you’ve ever struggled with a plant that refuses to thrive, the culprit might be the wrong soil or a pot that holds too much water. Let’s make sure your rubber tree care starts with a solid foundation. Best Soil for a Thriving Rubber Plant Rubber plants hate soggy roots, so well-draining soil is a must. A mix of 80% high-quality potting soil + 20% perlite works wonders. The potting mix provides nutrients, while the perlite improves aeration and prevents root rot. You can also mix in orchid bark for extra drainage. Pro Tip: If your soil stays wet for too long, your plant might start dropping leaves. Repotting into a lighter mix can fix this! Choosing the Perfect Pot Not all pots are created equal! Rubber plants love a breathable pot with drainage holes. Here are your best options: Terracotta or clay pots: These wick away excess moisture, preventing overwatering. Ceramic pots: Stylish and sturdy, but make sure they have drainage holes. Plastic pots: Lightweight and budget-friendly, but they hold moisture longer—so water sparingly! Make sure your pot isn’t too big. A pot that’s just 1-2 inches wider than the root ball helps prevent excess moisture buildup. How to Repot a Rubber Tree Plant If your rubber plant looks root-bound (roots circling the pot), it’s time to repot! Here’s a quick guide: Choose a pot 1-2 inches larger than the current one. Fill the bottom with fresh, well-draining soil. Gently remove the plant, shaking off excess old soil. Place it in the new pot and fill the gaps with soil—don’t pack it too tight! Water lightly and let it settle. Repotting every 2-3 years keeps your rubber tree care routine on track and encourages fresh growth! Pruning & Shaping: How to Trim a Rubber Tree Ever wonder how to make a rubber plant grow full and bushy instead of tall and leggy? The secret is pruning! A little trim here and there can turn a scraggly plant into a lush, vibrant centerpiece. Don’t worry—it’s easier than you think, and your plant will thank you with fresh, healthy growth. Why Prune Your Rubber Plant? Pruning isn’t just about keeping your plant pretty (though that’s a bonus!). It helps with: ✔ Encouraging bushy growth – Cutting the top makes your plant branch out instead of growing straight up.✔ Removing damaged leaves – Yellow, crispy, or dying leaves? Snipping them off helps your plant focus on healthy growth.✔ Controlling size – Rubber trees can get huge if left untrimmed. Pruning keeps them at a manageable height for indoor spaces. Pro Tip: If you’ve been wondering how to make a rubber plant bushy, pruning is the best trick! How to Trim a Rubber Tree (Step-by-Step Guide) 1️⃣ Choose the right tool – A sharp, clean pair of pruning shears works best. Wipe them down with rubbing alcohol to prevent spreading bacteria.2️⃣ Find the right spot – Look for a node (where a leaf meets the stem). Cutting just above a node encourages new growth.3️⃣ Make the cut – Trim at a 45-degree angle to help the plant heal faster.4️⃣ Wipe away sap – Rubber plants ooze a milky sap when cut. It’s harmless but
Aglaonema Pictum Tricolor – Exotic Beauty Unveiled
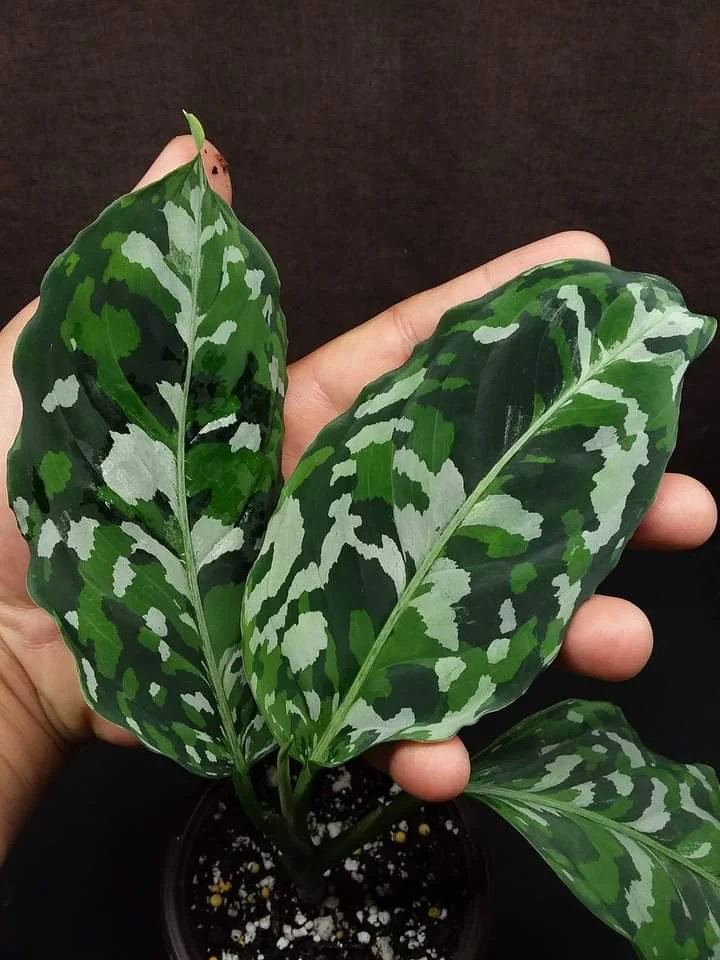
Aglaonema Pictum Tricolor – Exotic Beauty Unveiled Introduction Ever seen a plant with a camouflage pattern? That’s the Aglaonema pictum tricolor! This rare houseplant has three shades of green on its leaves, giving it a one-of-a-kind look. Often called the camo plant, it’s slow-growing but worth the wait. Finding a tricolor aglaonema can be tricky, but caring for one is easy with the right tips. In this guide, I’ll walk you through Aglaonema pictum tricolor care, simple propagation methods, and how to fix common problems. Ready to grow this beauty? Let’s get started! What is Aglaonema Pictum Tricolor? The Aglaonema pictum tricolor is a rare houseplant with a unique look. Its leaves have three shades of green, creating a camouflage pattern. This earned it the nickname camo plant. It’s slow-growing but highly prized by collectors. This plant comes from the tropical rainforests of Sumatra and Nias. It thrives in warm, humid conditions. Unlike common Aglaonema plants, it’s harder to find and more expensive. Many confuse it with the Aglaonema pictum bicolor or Aglaonema pictum peacock. The difference? The bicolor has only two shades of green. The peacock has a more scattered pattern. But the pictum tricolor stands out with its perfect three-tone blend. Why is it so rare? It grows slowly and is tricky to propagate. Demand is high, but supply is low. That’s why a mature tricolor aglaonema can be pricey. But if you find one, it’s worth the wait! Aglaonema Pictum Tricolor Care Guide Caring for an Aglaonema pictum tricolor is simple with the right approach. This rare plant thrives when you balance light, water, and humidity. Follow these easy steps to keep your tricolor aglaonema healthy and vibrant. Light Needs This plant loves bright, indirect light. Too much direct sun can burn its leaves. A spot near a curtained window is ideal. If the colors fade or growth slows, move it to a brighter place. Soil Requirements Use a well-draining soil mix to prevent root rot. A blend of potting soil, perlite, and orchid bark works well. This keeps the roots moist but not soggy. Watering Schedule Water when the top 1-2 inches of soil feel dry. Keep it moist but never soaked. Overwatering leads to root rot, while dry soil can stress the plant. Use room-temperature water to avoid shock. Temperature & Humidity This camo plant loves warmth and humidity. Keep temperatures 65-80°F (18-27°C) and humidity above 60%. If your home is dry, use a humidifier or a water tray near the plant. Fertilizing Feed every 4-6 weeks during spring and summer. A balanced liquid fertilizer at half strength works best. Too much fertilizer can harm the roots, so less is more. With steady care, your Aglaonema pictum tricolor mature plant will stay lush and beautiful. How to Propagate Aglaonema Pictum Tricolor So, you’ve got an Aglaonema pictum tricolor and you’re thinking, “I’d love to have more of these!” Good news—you can! While this camo plant is slow-growing, propagation isn’t as tricky as you might think. With a little patience and the right technique, you can multiply your tricolor pictum collection in no time. There are two easy ways to propagate an Aglaonema pictum tricolor: division and stem cuttings. Each method has its perks, so pick the one that works best for you. Method 1: Propagation by Division (Best for a Mature Tricolor Aglaonema) If you have an aglaonema pictum tricolor mature plant with multiple stems, division is the easiest way to get a new plant fast. Here’s how: Gently remove the plant from its pot. If it’s a bit stubborn, tilt the pot and tap the sides to loosen the soil. Find a natural division point. Look for offshoots or separate clusters of stems that have their own root system. Carefully separate the stems. Use your hands to tease them apart. If the roots are tangled, you can use a clean knife to cut through them, but be gentle. Replant each section in a well-draining soil mix (equal parts potting soil, perlite, and orchid bark work great!). Water thoroughly. Give your new plants some love! Place them in a warm, humid spot with bright, indirect light. Keep the soil slightly moist but not soggy. That’s it! The division method is perfect for an aglaonema pictum tricolor mature plant that’s ready to be shared. Method 2: Propagation by Stem Cuttings (For Those Who Love Watching Roots Grow!) If your plant is a bit leggy or you just want to experiment, stem cuttings are a great way to propagate your tricolor pictum in water or soil. Take a healthy cutting from the mother plant. Use sterilized scissors or pruning shears to cut a stem with at least 3-4 nodes (the little bumps where roots and leaves grow). Remove the bottom leaves to expose the nodes. This helps the plant focus on growing roots instead of supporting leaves. Choose your rooting method: Water propagation: Place the cutting in a glass of clean, room-temperature water. Make sure the nodes are submerged, but the leaves stay dry. Refresh the water weekly. Soil propagation: Plant the cutting directly into a small pot with a moist, well-draining soil mix. Water lightly and keep the humidity high. Wait patiently. In a few weeks, you’ll start to see roots forming. Once the roots are about 1-2 inches long, you can plant the water-rooted cuttings into soil. Care for your baby plant. Keep it warm, give it bright, indirect light, and maintain humidity. Within a few months, your aglaonema tricolor will start growing new leaves! Propagation Tips for Success If you’re propagating in water, add a tiny bit of liquid fertilizer after a couple of weeks to encourage root growth. For high humidity, place a clear plastic bag over the pot to create a mini greenhouse effect. Be patient! Aglaonema pictum tricolor propagation takes time—sometimes several weeks or even months before you see significant growth. Common Problems & Solutions Caring for an Aglaonema pictum tricolor is simple—until something goes wrong. One day, your camo
White Princess Philodendron – A Must-Have Plant!
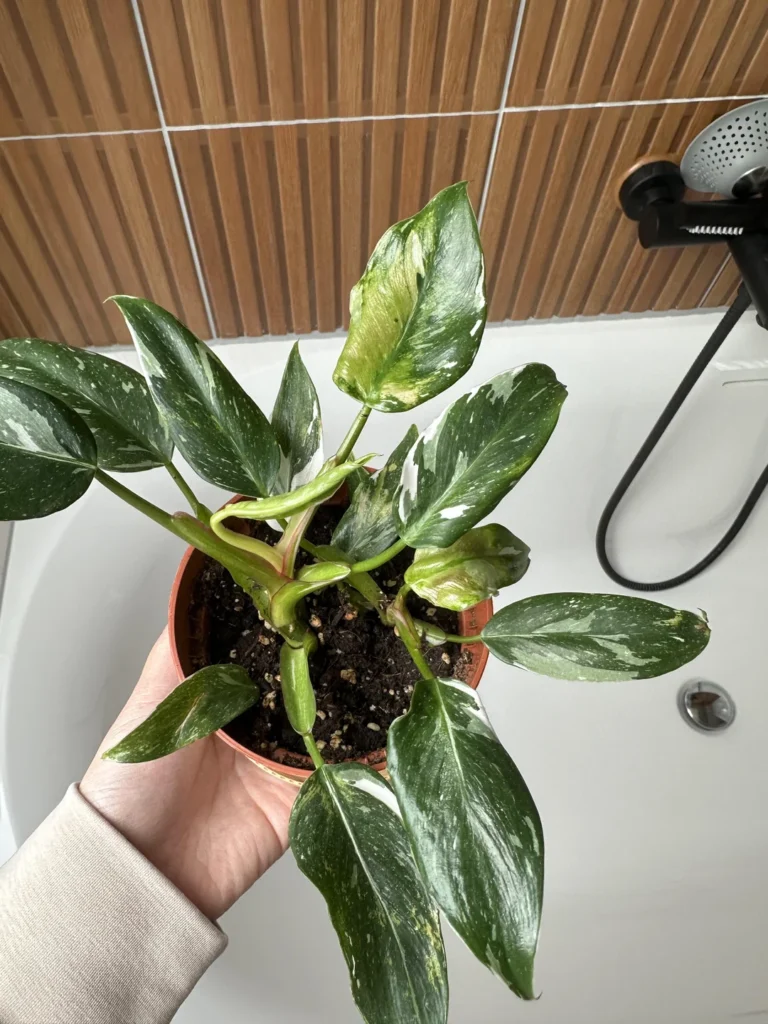
White Princess Philodendron – A Must-Have Plant! Introduction The White Princess Philodendron is a true showstopper. Its green leaves streaked with crisp white make it a favorite for plant lovers. But keeping it happy takes the right care. I’ve grown many Philodendrons, and I know how tricky variegated ones can be. Too much shade? You lose the white. Too much sun? The leaves burn. If you want to keep your White Princess Plant thriving, you’re in the right place. In this guide, I’ll share simple White Princess Philodendron care tips. You’ll also learn how it compares to the White Knight and White Wizard Philodendron. Let’s get started! What Is a White Princess Philodendron? The White Princess Philodendron is a stunning houseplant. Its green leaves have streaks of bright white, giving it an elegant look. Each leaf is unique, with patterns that change as it grows. If you love rare plants, this one is a great choice. This plant is part of the Philodendron family, like the White Wizard and White Knight Philodendron. But it has pink or red-tinted stems, unlike the White Wizard Plant, which has all-green ones. Its compact size makes it perfect for small spaces. Collectors love the White Princess Plant for its rare variegation. But it needs the right care to keep its white markings. Don’t worry—I’ll show you how to keep yours looking its best! White Princess vs. White Wizard vs. White Knight – What’s the Difference? If you’ve been searching for a White Princess Philodendron, you’ve probably come across two similar plants: the White Wizard and White Knight Philodendron. They all have beautiful white variegation, but they aren’t the same. Let’s break it down so you can tell them apart at a glance. White Princess vs. White Wizard Philodendron The biggest difference? Stem color. The White Wizard Philodendron has all-green stems, while the White Princess has pink or reddish stems. Their leaves also set them apart. The White Wizard Plant has broader leaves with softer variegation, while the Philo White Princess has sharper contrast with bright white streaks. If you want a plant with more compact growth and bold patterns, the White Princess Plant is the winner. But if you prefer a larger plant with a softer look, the Philodendron White Wizard Large is a great pick. White Princess vs. White Knight Philodendron Now, let’s compare the White Princess and White Knight. Again, stem color plays a big role. The White Knight Philodendron has deep red or even dark purple stems, while the White Princess has a lighter pinkish-red tint. Their leaves also differ—White Knight leaves are thicker and sometimes have a rubbery feel. Want a plant that stays compact? Go for the White Princess Philodendron. If you love a taller, more dramatic look, the White Knight is a great choice. Quick Comparison Chart Feature White Princess White Wizard White Knight Stem Color Pink/Red Green Dark Red/Purple Leaf Shape Narrow, pointed Broad, rounded Thick, rubbery Growth Habit Compact Large, spreading Taller, climbing Variegation Bold contrast Softer, blended Mix of patterns Each of these plants is stunning, but knowing their differences helps you choose the right one for your space. Which one is your favorite? Let me know in the comments! How to Care for a White Princess Philodendron Taking care of a White Princess Philodendron isn’t hard, but it does need the right balance. Too much light? The leaves burn. Too little? The white fades. Overwatering? Root rot. I’ve made these mistakes before, so let me save you the trouble! Light Requirements Your White Princess Plant thrives in bright, indirect light. This keeps the white parts from turning brown or disappearing. A spot near a window with sheer curtains works best. If the leaves start looking too green, try moving it to a brighter spot. Watering Needs This plant likes its soil slightly moist but never soggy. Water when the top inch of soil feels dry. Too much water? The leaves will yellow. Too little? They’ll droop. I always do the finger test—stick a finger in the soil. If it’s dry, it’s time to water! Humidity & Temperature The Philo White Princess loves warmth and high humidity—think tropical vibes. If your home is dry, use a humidifier or place a tray of water near the plant. Keep temperatures between 65–80°F (18–27°C) and avoid cold drafts. Soil & Potting Mix A well-draining mix is key. I use a blend of potting soil, perlite, and orchid bark. This keeps roots healthy and prevents water from sitting too long. If you’re repotting, choose a pot with drainage holes to avoid root rot. Fertilization Feed your Philodendron White Princess with a balanced liquid fertilizer every 4–6 weeks during the growing season (spring and summer). Skip winter feedings—plants rest during colder months. Caring for a White Princess Philodendron is all about balance. Give it the right light, water, and humidity, and it’ll reward you with stunning, variegated leaves! Common Problems and How to Fix Them Even with the best care, your White Princess Philodendron might run into a few issues. Don’t worry—I’ve been there! Here’s how to troubleshoot the most common problems and keep your plant thriving. Yellowing Leaves Uh-oh, yellow leaves? This usually means overwatering. I’ve made this mistake before—thinking my Philo White Princess needed more water when it actually needed less. Check the soil. If it’s soggy, let it dry out before watering again. Make sure your pot has drainage holes, and consider switching to a well-draining mix like potting soil with perlite and orchid bark. If the yellowing is happening only to older leaves, it might just be natural shedding. No need to panic! Brown or Crispy Edges Crispy leaf edges? That’s usually a sign of low humidity or too much direct sun. Since the White Princess Plant loves tropical conditions, dry indoor air can stress it out. I keep mine near a humidifier or use the pebble tray method—a shallow tray with water and pebbles under the pot to boost humidity. If the leaves look
Amazing Philodendron Tortum Care Tips Revealed
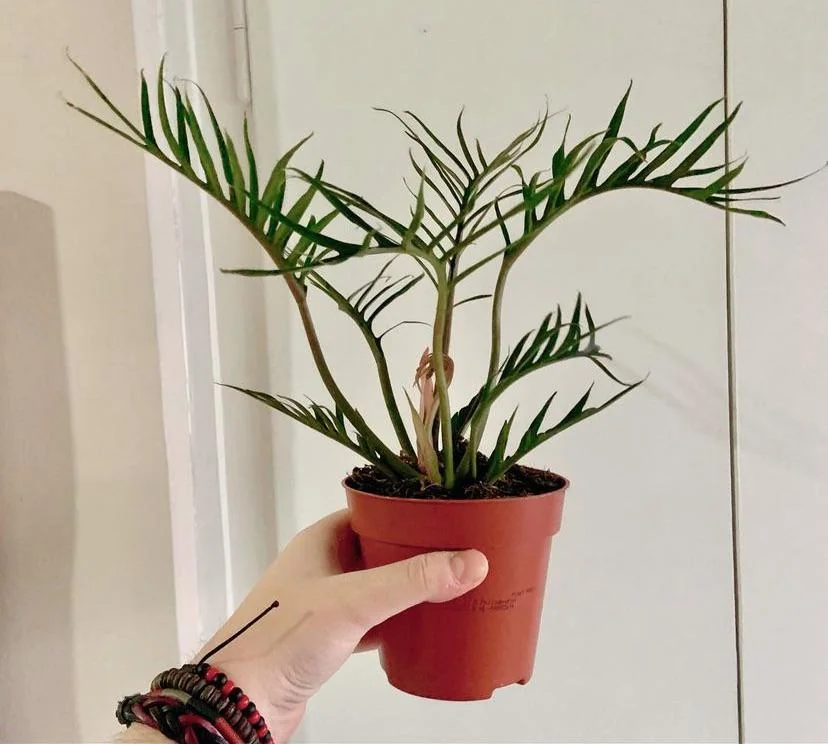
Amazing Philodendron Tortum Care Tips Revealed Introduction Ever seen a plant that looks like a mix of a fern and a palm but is actually a philodendron? That’s the Philodendron Tortum, and trust me, it’s a stunner. With its delicate, twisted leaves, this tortum plant brings an elegant, tropical vibe to any space. But don’t let its exotic look fool you—it’s surprisingly easy to care for! Whether you’re wondering “Is Philodendron Tortum a climber?” (spoiler: yes, and it loves a moss pole!) or need tips on Philodendron Tortum light requirements, I’ve got you covered. In this guide, I’ll share everything you need to know about Philodendron Tortum care, propagation, and growth—all in a way that’s simple, fun, and easy to follow. Let’s dive in! What is a Philodendron Tortum? Philodendron Tortum is a plant like no other. Its long, skinny leaves twist and curl, making it look almost like a fern or palm. But don’t be fooled—it’s a true philodendron! This tortum plant brings a bold, tropical feel to any space. It comes from the rainforests of South America, where it climbs trees to reach sunlight. So, is Philodendron Tortum a climber? Yes! It grows best with support, like a Philodendron totem or moss pole. Young plants may stay bushy, but as they mature, they love to climb. Compared to other philodendrons, Tortum Philodendron stands out. It has thinner, more delicate leaves than a Philodendron Totem, giving it an airy, sculptural look. There’s even a rare Philodendron Tortum variegated version with white streaks! If you love easy-care plants that look exotic, Philo Tortum is a perfect choice. Next, let’s dive into how to care for it! Philodendron Tortum Care Guide Taking care of a Philodendron Tortum is easier than you think! This tropical beauty may look delicate, but it’s a hardy plant when given the right conditions. Let’s go over the essentials, from light requirements to watering, soil, and more. Light Requirements Philodendron Tortum loves bright, indirect light. Think of the dappled sunlight filtering through a rainforest canopy—that’s what it craves. Too much direct sun can scorch its leaves, while too little will slow its growth. A spot near an east or north-facing window is perfect. If your home is dim, a grow light can help. Watering Needs The key to Philodendron Tortum care is balance. Water when the top 1-2 inches of soil feel dry. Too much water? The roots might rot. Too little? The leaves may droop. A good rule of thumb: less is more in cooler months, while summer calls for more frequent watering. Soil & Potting Mix Like most philodendrons, this plant loves airy, well-draining soil. A mix of orchid bark, perlite, and peat-based potting soil works great. This helps mimic the loose, rich forest floor it naturally grows on. Avoid heavy, compacted soil—it holds too much moisture and can lead to root rot. Temperature & Humidity Since it’s a tropical tortum plant, it thrives in warm, humid conditions. Ideal temperatures range from 65-85°F (18-29°C). It can handle slightly cooler nights but won’t survive frost. Boost humidity with a pebble tray, humidifier, or by grouping it with other plants. If your home is dry, misting can help—just avoid soaking the leaves. Fertilization For healthy growth, fertilize monthly during spring and summer. A balanced liquid fertilizer diluted to half-strength works well. In winter, when growth slows, you can skip feeding. Repotting & Pruning As your Philodendron Tortum matures, it may need repotting every 1-2 years. Choose a pot one size bigger with drainage holes. Prune any leggy stems or yellowing leaves to keep it looking fresh. Up next: Propagation! Want more of these beauties? Let’s learn how to grow new plants from cuttings! Philodendron Tortum Propagation Want to grow more of your Philodendron Tortum? You’re in luck! Propagating this beauty is easy, fun, and super rewarding. Whether you’re sharing a piece with a friend or just want more tortum plants around your home, follow these simple steps to get started. Best Method: Stem Cuttings The easiest way to propagate Philodendron Tortum is through stem cuttings. This method works whether you root them in water or soil. Step-by-Step Propagation Guide Choose a Healthy Stem – Look for a Philodendron Tortum mature stem with at least one node (the small bump where roots will grow). Make a Clean Cut – Use sharp, sterilized scissors to cut just below a node. A 4-6 inch cutting is ideal. Decide: Water or Soil? Water Method: Place the cutting in a jar with filtered water. Change the water every few days to prevent bacteria. Soil Method: Plant the cutting in a moist, well-draining mix (like the one used for regular Philodendron Tortum care). Keep the soil slightly damp but not soggy. Provide Warmth & Humidity – Place the cutting in bright, indirect light and keep humidity levels high. Covering it with a clear plastic bag can help. Wait for Roots! – In about 2-4 weeks, you should see new roots forming. Once they’re at least 2 inches long, your cutting is ready for its own pot! Tips for Success 🌿 Use rooting hormone for faster growth.💧 If using water, switch to soil once roots appear to avoid shock.🌞 Avoid direct sunlight, which can dry out your cutting too soon. That’s it! Philodendron Tortum propagation is simple, and before you know it, you’ll have more gorgeous plants to enjoy. Next up: How to help your Tortum thrive with climbing support! Supporting Growth: Climbing & Totem Use Did you know that Philodendron Tortum isn’t just a pretty plant? It’s a natural climber! In the wild, it wraps around tree trunks, reaching for sunlight. Giving it support at home helps it grow strong and healthy. Plus, it makes those stunning, twisted leaves stand out even more. Why Philodendron Tortum Loves to Climb Think of your Tortum Philodendron like an adventurer. Without a climbing structure, it sprawls and gets leggy. But with a totem or moss pole, it grows upright, with fuller, healthier leaves. As a
Yucca Plant Indoor: Secrets to Amazing Growth

Yucca Plant Indoor: Secrets to Amazing Growth Ever thought about adding a yucca plant indoor to your home? If you love low-maintenance greenery that thrives with minimal effort, this tough yet stylish plant might be your perfect match. I’ve had my fair share of fussy houseplants, but my yucca? It practically takes care of itself. Whether you’re new to growing yucca indoors or just want better indoor yucca care tips, this guide will make it easy. Let’s dive in and make your yucca thrive! What is a Yucca? Ever seen a plant that looks like a mini palm tree but is super easy to care for? That’s the yucca! It comes from dry, sunny places and has thick, spiky leaves that hold water. This makes it perfect for growing yucca indoors with little effort. Not all yuccas work as houseplants. Some grow huge outside, but indoor types, like Yucca elephantipes, stay small and neat. A yucca plant indoor brings a fresh, natural vibe to your home—without needing much care. Even though it’s a desert plant, yucca does great inside. Give it light and let the soil dry between waterings, and it will thrive. Ready to learn more about yucca plant indoor care? Let’s dive in! Yucca Plant Indoor Benefits Thinking about getting a yucca plant indoor? You’re in for a treat! This tough, low-maintenance beauty isn’t just about looks—it comes with some amazing perks. First, yucca indoors helps clean the air. Its leaves absorb toxins and release fresh oxygen, making your home feel crisp and clean. If you love houseplants but forget to water them, good news! Yuccas store water in their thick leaves, so they handle dry spells like a champ. Plus, they add a stylish, modern touch to any space. Their tall, bold look makes a statement without demanding much care. Whether you’re new to plants or a pro, growing yucca indoors is a smart choice for a greener, healthier home. How to Care for Indoor Yucca Plant Caring for a yucca plant indoor is surprisingly easy. Think of it as a low-maintenance friend who thrives with a little love but never asks for too much! Here’s how to keep your yucca indoors happy and healthy. Light Requirements Ever wondered, “Is sunlight needed for yucca plant?” The answer is yes! Yuccas love bright, indirect light. A south- or east-facing window is perfect. If your space is a bit dim, no worries—yucca plants can adjust, but they grow best with plenty of light. Watering Needs The biggest mistake? Overwatering! Yuccas like their soil dry, not wet. A simple trick: Stick your finger in the soil. If the top 2 inches feel dry, it’s time to water. If it’s still damp, wait a few more days. Remember, yucca plant indoor care is all about “less is more” when it comes to water! Best Soil & Potting Mix To prevent root rot, use a well-draining mix like cactus or succulent soil. If the pot holds too much water, the roots will suffer. Also, make sure your yucca plant indoor is in a pot with drainage holes—this helps excess water escape. Temperature & Humidity No need to stress about humidity! Yuccas love normal indoor temperatures (60-80°F or 16-27°C). They handle dry air well, making them perfect for any home. By following these simple tips, growing yucca indoors is a breeze! Just remember: light, dry soil, and occasional watering. Your indoor yucca plant will reward you with stunning, vibrant leaves. How to Propagate a Yucca Plant Want more yucca plant indoor magic in your home? The good news—propagating a yucca is easier than you think! Whether you’re growing yucca indoors for the first time or just want to expand your collection, here’s how to do it. 1. Stem Cuttings – The Easiest Method Think of this as giving your plant a haircut with benefits. Cut a healthy stem (at least 4-6 inches long) using sharp, clean shears. Let it dry for a day—this helps prevent rot. Then, pop it into a pot with well-draining soil (cactus or succulent mix works best). Water lightly and place it in bright, indirect light. In a few weeks, you’ll see roots forming! 2. Offsets (Pups) – Instant Baby Plants Ever noticed tiny mini-yuccas sprouting at the base of your plant? Those are offsets (or pups), and they’re nature’s way of giving you free plants! Gently remove them, making sure they have some roots attached. Plant them in a new pot, water sparingly, and watch them grow! 3. Growing from Seeds – The Slow Route If patience is your thing, you can try growing yucca from seeds. But be warned—it’s a long journey. Plant seeds in well-draining soil, keep them warm and moist, and wait several weeks to months for sprouting. For quicker results, stick to stem cuttings or pups! Propagation Pro Tips: ✅ Use a well-draining potting mix to prevent root rot.✅ Keep new cuttings in a warm, bright spot—but no direct sun!✅ Water lightly; too much water can kill your baby plant before it even starts. Before you know it, you’ll have multiple thriving yucca plants indoors—ready to bring that modern, desert-chic vibe to your space! Common Indoor Yucca Plant Problems & Solutions Even though the yucca plant indoor is one of the easiest houseplants to grow, sometimes it throws a little tantrum. If your yucca isn’t looking its best, don’t worry! I’ve been there, and most problems are easy to fix. Let’s troubleshoot together! 1. Yellow Leaves – What’s Going On? One day, your yucca indoors looks amazing. The next, the leaves start turning yellow. Sound familiar? Don’t panic—this is usually fixable. Possible Causes: Natural Shedding – Yuccas drop old leaves as they grow. If only the bottom leaves are yellow, this is totally normal! Just remove them and let your plant focus on new growth. Overwatering – If the soil stays damp for too long, roots suffocate, and leaves turn yellow. Check the soil—if it’s wet, let it dry out completely before watering
How To Grow and Care For Philodendron Brasil
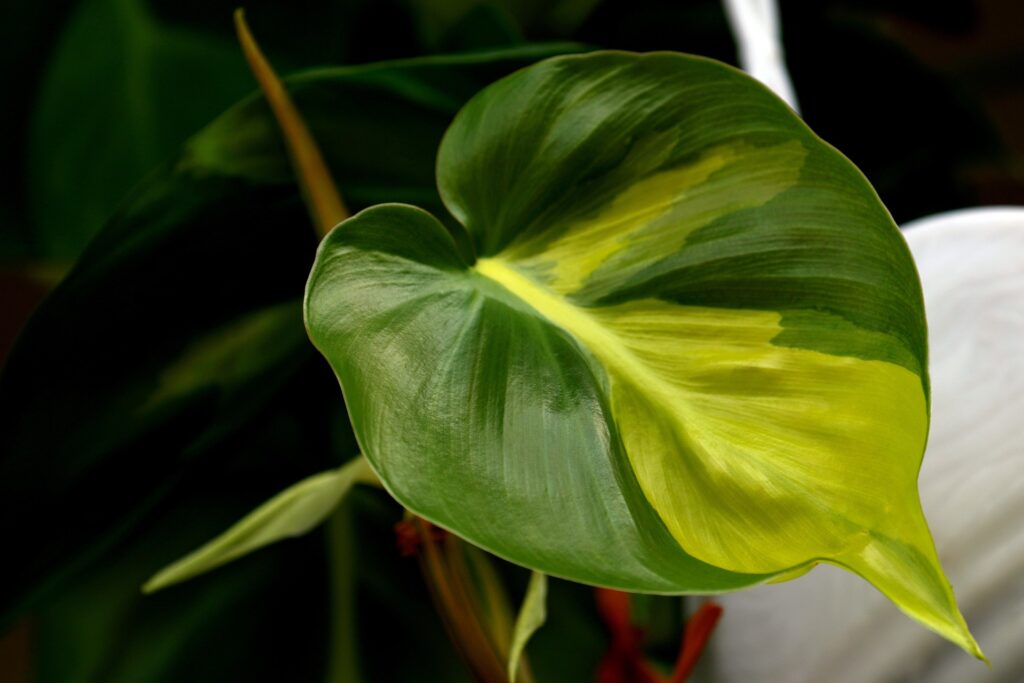
How To Grow And Care For Philodendron Brasil In scientific terms, Philodendron Brasil, or Philodendron Hederaceum ‘Brasil’, is a charming plant famous for its bright and colorful leaves. This variation of the widely adored. Heartleaf philodendron has green leaves with thick and wide streaks like paintbrush strokes in lime yellow. It has long dangling free-growing stalks, which makes it attractive for hanging baskets, shelves, and indoor trellises. It helps you to add color to your dull space. Philodendron Brasil is a decorative plant. It is simple to grow plants at the house which makes it a fulfilling experience for a gardener. If someone has a corner that needs brightening with an alluring touch then Philodendron Brasil is ideal since it can add a tropical touch to your house. Essential Guide for Philodendron Brasil Care Taking care of Philodendron Brasil is easy if proper methods are put into practice. Make your plant sustain the following basic guide measures. Light Philodendron Brasil prefers getting placed in unfurnished bright spaces but at the same time can adjust to slightly dim spaces. Avoid sunny areas since they can damage the leaves. Watering Needs When the first 1-2 inches of soil are dry, you can water Brazil Philodendron. But make sure not to put in too much water as this is the common cause of root rot. In addition, yellowing leaves may indicate excessive water supply to the plant while the droopy leaves tell you that the plant has been under-watered. Humidity And Temperature Brazilian philodendron is a tropical plant that has a hard time surviving in dry environments. A humidity of 40-60% is acceptable but for ideal growth, a range of 60-80% is preferred. If the room is too dry, humidifiers can be used to increase humidity, or water can be placed on a pebble tray below the plant. The temperature should be between 65-80 Fahrenheit and sudden fluctuations should be avoided. Soil and Potting The only thing to keep in mind with the potting mix is to make sure it has a good drainage system. A peat, perlite, and average potting soil mix is also helpful. Such a mix provides a good amount of nutrients to the plant and can be used for 1-2 years before having to refresh. While refreshing the potting mix, remember to use a pot with holes to avoid root rot. Fertilizing A balanced liquid fertilizer is to be applied once every 4-6 weeks during the growth season of spring and summer. As winter and autumn tend to be harsher for the plants, the frequency should be drastically reduced. By carefully looking after the plants, in ample time you will have well-developed thick Brazilian Philodendron foliage that looks mesmerizing through all the seasons. How to Propagate Philodendron Brasil Philodendron Brasil can be simply cloned through cuttings since it is very easy to propagate. These steps should be followed to propagate the plant successfully: Collect the Required Equipment Get a scissor or pruning shear and ensure they are clean and sharp. Get a pot with clean and well-draining soil or get a jar with water. Rooting hormone can also be used to boost the chances of growing roots. Cut a Healthy Cutting Cut off a healthy section of vine which bears a few leaves along with nodes. Under a node, cut that section making sure the cut is 4-6 inches in length. This is what you will use as a cutting. Prepare the Cutting To prevent the leaves that are closer to the bottom node from rotting, remove them. This should be done since leaving that leaf on will mean that it remains wet and that would make them rot. The top leaves should be kept intact since it is the only chance for photosynthesis to occur until rooting. Different Methods for Propagation Water Propagation Place the cutting of the plant into clean water, and fill the jar to the point where the bottom nodes are submerged by the water. Keep the jar at a bright but indirect light source. To prevent any bacterial growth, make sure to switch up the water every 3-5 days. After placing the cut into water, you should be able to see the roots forming within 2-4 weeks. When the roots of the cutting are around 1 to 2 inches long, place the cutting pot into the soil. Soil Propagation Dip the cut end into rooting hormone (optional) and place it into moist, well-drained soil. Apply water consistently to the soil but do not saturate it; give the pot indirect sunlight. Roots will be ready in a span of two to four weeks. Aftercare for New Plants At last, when your nurturing of new plants is done, treat them like normal, grown-up Philodendron Brasil. Water and fertilizer them routinely. With these steps, soon enough you will have new Philodendron Brasil plants that you can add to your collection or ones to give away! How to Prune Philodendron Brasil Pruning Philodendron Brasil is an important task to ensure the plant is healthy and enhances growth. The following is a basic guide to get started: Why Would You Prune Your Philodendron Brasil? Avoid overgrowth: By cutting down on overgrowing, new growth will be spurred and the fullness of the plant will be flaunted. Removal and targeting of its trailing vines: Cut down or target portions that do not fit the look you want or if you want to prevent them from overgrowing. Cure broken leaves: Helps the plant to save energy by providing oxygen to more useful components. When Should You Prune? The best time to trim Brasil Philodendron is spring since lots of growth occurs during this season and quite a lot of growth is seen in summers as well, hence a lot of leave is seen being obscured. Avoid major pruning in the winter and autumn since most of the activities are dormant. How to Prune Philodendron Brasil It is very important to prune a Philodendron Brasil to sustain the plant’s health, achieve denser
Wandering Jew Plant Care: Expert Tips!
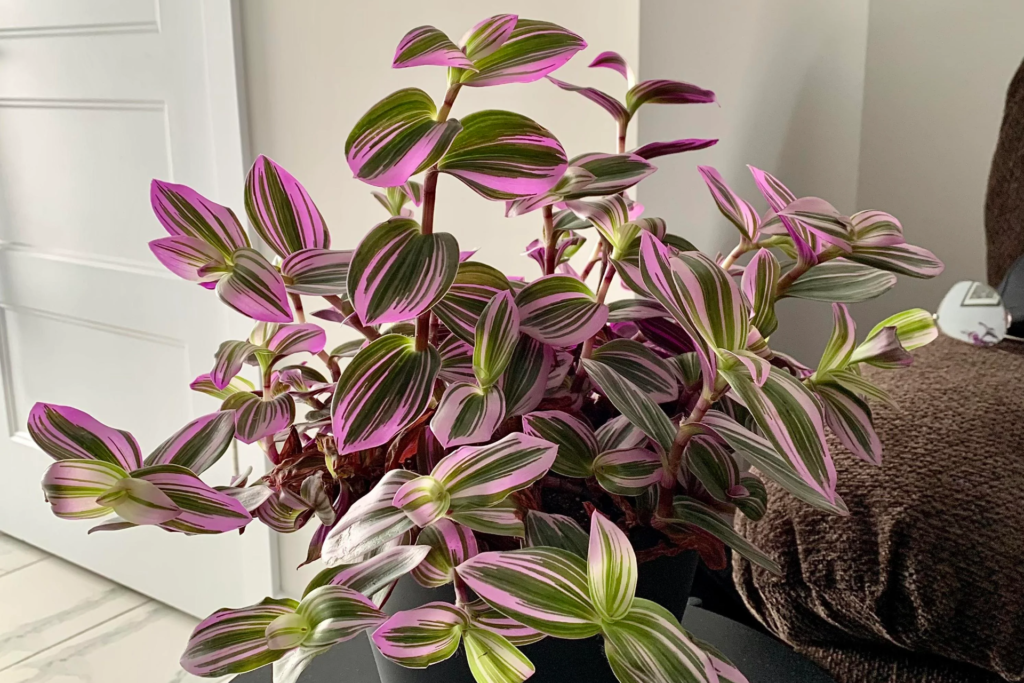
Wandering Jew Plant Care: Expert Tips! Introduction The wandering jew plant is one of the easiest houseplants to grow. Its trailing vines and colorful leaves make it a favorite for both beginners and experts. But how much sunlight does a wandering jew need? How do you water it without overdoing it? In this guide, I’ll break down wandering jew plant care into simple steps so you can keep yours thriving with minimal effort. Let’s get started! What is the Wandering Jew Plant? The wandering jew plant is a fast-growing houseplant with trailing vines and colorful leaves. It comes in different varieties, like Tradescantia zebrina, Tradescantia pallida, and Tradescantia fluminensis. Its bright purple, green, and silver tones make it a stunning addition to any space. Many people love this plant because it’s easy to grow. It thrives indoors and works well in hanging baskets or pots. If you’re wondering, “why is the wandering jew plant important to humans?”, the answer is simple—it’s low-maintenance, air-purifying, and easy to propagate. Just cut a stem, place it in water, and roots will appear in days! This plant also grows outdoors in warm climates. But wandering jew plant care outdoor comes with a catch—it spreads fast and can become invasive. With regular trimming, though, it stays manageable and beautiful. Wandering Jew Sunlight Requirements Light plays a huge role in keeping your wandering jew plant happy and colorful. This plant loves bright, indirect sunlight, but it can handle some direct sun too. The more light it gets, the more vibrant its purple, green, and silver leaves will be. If it’s not getting enough light, the colors may fade, and the plant can become leggy. So, how much sun does a wandering jew need? Ideally, place it near a window with filtered sunlight. If you’re growing it outdoors, choose a spot with morning sun and afternoon shade. Too much harsh sun can scorch the leaves, while too little light makes them dull. If your plant looks stretched out or pale, it’s craving more light. Try moving it closer to a bright window or using grow lights in darker spaces. With the right balance, your wandering jew plant care routine will be much easier, and your plant will stay lush and beautiful! Watering and Soil Needs Getting wandering jew plant watering right is the key to keeping it lush and vibrant. This plant loves moist soil, but too much water can lead to root rot. The best way to water? Check the top inch of soil—if it feels dry, it’s time to water. If it’s still damp, wait a little longer. When you do water, soak the soil until excess drains from the bottom. Never let the plant sit in standing water. A well-draining pot with drainage holes is a must! If you’re growing it outdoors, make sure the soil doesn’t stay soggy after rain. For the best wandering jew plant care, use light, airy soil that drains well. A mix of potting soil, perlite, and peat moss works great. This helps prevent overwatering while keeping roots happy. With the right watering and soil, your wandering jew plant will thrive with minimal effort! Temperature and Cold Tolerance Let’s talk about temperature—because trust me, your wandering jew plant care routine will be much smoother if you get this part right! This plant may look tough, but it actually prefers a cozy, warm environment. Think of it like a friend who loves summer but complains the second the temperature drops—yep, that’s your wandering jew! So, how cold hardy is a wandering jew? Not very. It thrives in temperatures between 60–80°F (15–27°C) but starts struggling if it dips below 50°F (10°C). If you’re growing it outdoors, watch out for chilly nights! A sudden drop can make the leaves wilt, and prolonged cold can kill the plant entirely. Winter Care Tips If you’re growing your wandering jew plant outdoors and live in a colder climate, don’t panic—just bring it inside before temperatures drop. If you can’t move it indoors, covering it with a frost cloth or placing it near a warm wall can help. But honestly, once temps hit the 40s, this plant starts waving the white flag. Indoors, avoid placing it near drafty windows or doors in winter. You know that chilly gust of air you feel when someone opens the door? Your wandering jew hates that too! Keep it in a warm spot with bright, indirect light (hello, wandering jew sunlight needs!) for the best growth. Wandering Jew Cold Tolerance: What to Watch For Cold stress shows up in different ways, but the most common signs are wilting, leaf drop, and brown or mushy leaves. If you see this happening, check the temperature immediately. Move your plant to a warmer location, trim off any damaged parts, and give it a little extra care. On the flip side, wandering jew plant care outdoor in warm climates is super easy! It thrives in tropical and subtropical areas, growing like crazy in hanging baskets, garden beds, or even as ground cover. Just keep it in check—this plant grows fast and can take over if you let it! Final Thoughts on Temperature Care If you want vibrant, trailing vines all year round, keep your wandering jew in a warm, stable environment. Whether indoors or outdoors, it prefers warmth over cold any day. With the right care, your plant will keep growing, trailing, and showing off those gorgeous purple and green leaves no matter the season! Pruning, Propagation, and Growth Habits Let’s be real—your wandering jew plant doesn’t just grow, it thrives. This plant is like that overachiever who never slows down. Give it what it needs, and it’ll reward you with fast-growing, trailing vines full of vibrant purple, green, and silver hues. But if you want to keep it looking its best, a little pruning and propagation go a long way! Pruning: Keep It Bushy and Beautiful If you’ve ever wondered why your wandering jew looks a little leggy or stretched out, it’s probably
Amazing Secrets: Propagate Snake Plants Easily
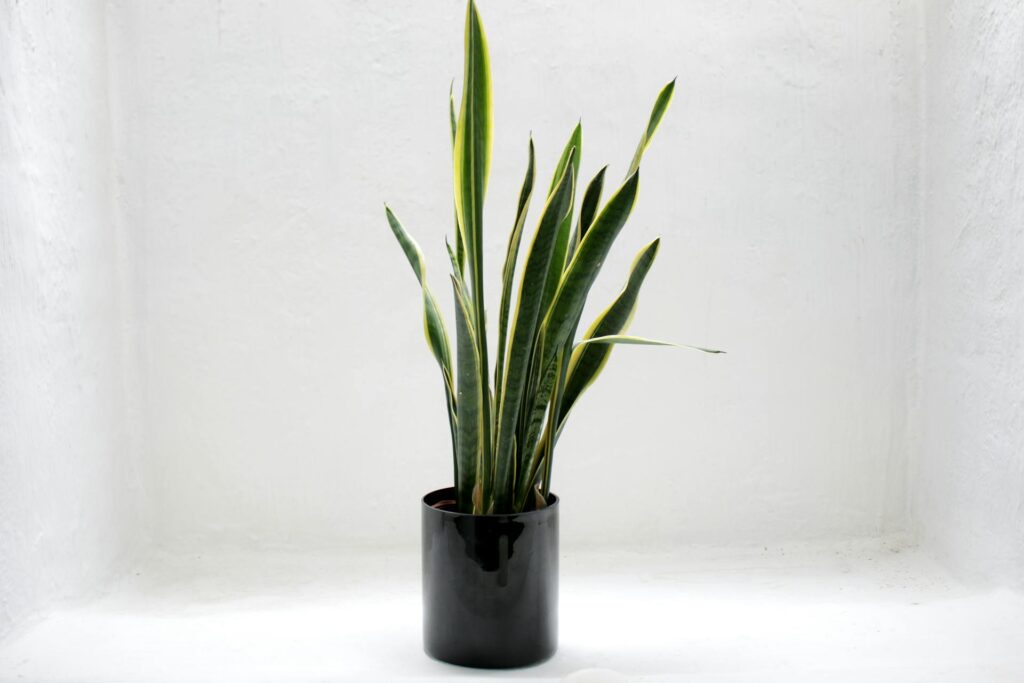
Amazing Secrets: Propagate Snake Plants Easily Introduction There’s something magical about watching a new plant grow from a single leaf, and snake plants make it surprisingly easy. If you’ve ever wondered how to propagate a snake plant without fancy tools or gardening skills, you’re in for a treat. I’ve been growing snake plants for years, and trust me—once you start propagating, it’s hard to stop! In this guide, I’ll walk you through simple, foolproof methods to multiply your plants, whether by division, leaf cuttings, or water propagation. Get ready to turn one snake plant into many with just a little patience and the right technique! Understanding Snake Plant Varieties Snake plants, also known as Sansevieria, are popular houseplants. They are easy to care for and come in many types. One common variety is the ‘Laurentii’, which has tall green leaves with yellow edges. Another type is the ‘Cylindrica’, featuring round, upright leaves. For small spaces, the ‘Hahnii’ is ideal; it stays compact and forms a rosette of leaves. Each variety thrives with minimal water and can handle different light conditions. Choosing the right type can add beauty to your home. Methods of Propagation Propagating snake plants is a rewarding experience. There are three main methods: division, leaf cuttings in soil, and leaf cuttings in water. Each has its own steps and benefits. Division Method This is the quickest way to propagate. Start by removing the plant from its pot. Gently separate the root clumps, ensuring each section has roots and leaves. Replant these sections into new pots with well-draining soil. This method maintains the characteristics of variegated varieties. Leaf Cuttings in Soil Begin by selecting a healthy leaf and cutting it near the base. Cut the leaf into 3-4 inch sections, keeping track of the bottom end. Allow the cuttings to callous over for a day or two. Plant the bottom end of each cutting about an inch deep in moist, well-draining soil. Over time, new roots and shoots will develop. Leaf Cuttings in Water Cut a healthy leaf near the base. Place the cut end in a container with about an inch of water. Position the container in bright, indirect light. Change the water weekly to prevent stagnation. Once roots develop, transplant the cutting into soil. Each method offers a unique way to multiply your snake plants. Choose the one that suits you best and enjoy the process of growing new plants. Caring for Newly Propagated Snake Plants Caring for your newly propagated snake plants is simple. Place them in bright, indirect light; direct sunlight can harm the leaves. Water sparingly, allowing the soil to dry between waterings to prevent root rot. Use well-draining soil, like a cactus mix, and ensure your pot has drainage holes. Snake plants prefer temperatures between 70°F and 90°F. Avoid cold drafts. Fertilize lightly during the growing season with a balanced, diluted fertilizer. With these steps, your snake plants will thrive. Common Issues and Solutions Even with the best care, snake plants can face a few hiccups during propagation. Let’s chat about some common issues and how to tackle them. Slow Growth Patience is key with snake plants; they’re naturally slow growers. If your new plant isn’t sprouting as quickly as you’d like, ensure it’s getting enough light. Bright, indirect light is ideal. Also, avoid overwatering, as too much moisture can hinder growth. Remember, these plants thrive on a bit of neglect. Leaf Yellowing or Rotting Noticing yellow or mushy leaves? This is often a sign of overwatering. Let the soil dry out between waterings, and always use well-draining soil. It’s also a good idea to check that your pot has drainage holes to prevent water from pooling at the bottom. Pest Troubles While snake plants are hardy, they can occasionally attract pests like mealybugs or spider mites. If you see tiny critters or webbing, gently wipe the leaves with a damp cloth and consider using a mild insecticidal soap. Keeping your plant clean can prevent these unwelcome guests. Root Rot Root rot is a common issue, especially if the plant is overwatered or the soil doesn’t drain well. To prevent this, use a well-draining soil mix and ensure your pot has drainage holes. If you suspect root rot, gently remove the plant from the soil, trim away any mushy or discolored roots, and repot in fresh soil. By keeping an eye out for these issues and addressing them promptly, your propagated snake plants will have a strong start and continue to thrive Safety Considerations While snake plants are a fantastic addition to any home, it’s important to be aware of their potential risks to pets and children. All parts of the snake plant contain saponins, natural compounds that can cause mild to moderate toxicity if ingested. Symptoms may include nausea, vomiting, and diarrhea. To keep everyone safe, place your snake plants out of reach of curious pets and young children. If ingestion occurs, it’s best to consult a veterinarian or healthcare professional promptly. By taking these precautions, you can enjoy the beauty of your snake plants while ensuring a safe environment for your loved ones. Conclusion Propagating snake plants is a rewarding and straightforward process. By following the methods outlined above, you can expand your collection or share these resilient plants with friends. Remember, patience is key, as new growth may take time. Enjoy the journey of nurturing your new plants, and soon, your home will be even greener.
Peperomia Rosso: A Stunning, Rare Beauty!
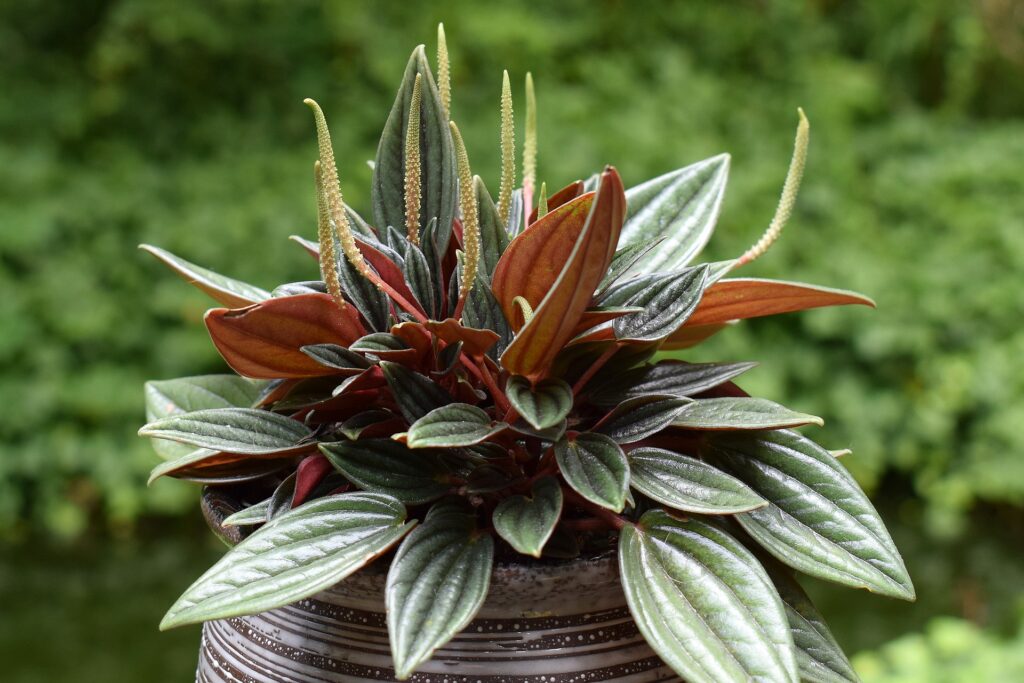
Peperomia Rosso: A Stunning, Rare Beauty! Introduction Peperomia Rosso is a small but stunning houseplant. Its deep green leaves have rippled textures, and the red undersides add a pop of color. It’s easy to care for and perfect for beginners. I’ve grown peperomia rosso plants for years, and they never fail to impress. They need little water, adapt well indoors, and rarely cause trouble. If you forget to water now and then, no worries—this plant is forgiving. In this guide, I’ll show you how to care for a Peperomia Rosso, fix common issues like yellow leaves, and even grow new plants through propagation. Plus, I’ll answer a common question: is Peperomia Rosso toxic to cats? Let’s dive in! What is Peperomia Rosso? Peperomia Rosso is a small, vibrant houseplant. Its leaves are deep green on top and rich red underneath. The rippled texture makes it even more unique. It grows in a compact rosette shape, perfect for small spaces. This plant comes from South America, where it thrives in warm, humid conditions. Luckily, it adapts well to indoor life. Peperomia Rosso care is simple, making it great for beginners. It doesn’t need much space or attention. If you want a stylish, low-maintenance plant, Peperomia ‘Rosso’ is a great choice. It adds color and character to any indoor garden. Peperomia Rosso Care: How to Keep Your Plant Thriving Peperomia Rosso is easy to grow. It doesn’t need much, but a few simple steps will keep it happy. With the right light, water, and soil, your plant will thrive. Light Requirements This plant loves bright, indirect light. A spot near a window is perfect. Too much sun can scorch the leaves, while too little can slow growth. A north- or east-facing window works well. If your only option is bright, direct light, use sheer curtains to soften it. Watering Needs Water only when the top inch of soil is dry. Too much water can cause root rot. This is one of the biggest mistakes with Peperomia Rosso care. Always use a pot with drainage holes. When watering, add just enough to moisten the soil, but don’t let it stay soggy. Humidity & Temperature Peperomia Rosso enjoys warm indoor temperatures. Keep it between 65-80°F (18-27°C). Avoid cold drafts from windows or air vents. It does fine in normal indoor humidity, but if your home is dry, misting the leaves now and then can help. Best Soil for Peperomia Rosso This plant needs light, well-draining soil. A mix of peat moss, perlite, and potting soil works best. Heavy, compact soil can hold too much water and cause yellow leaves. Fertilizing Tips Feed with a diluted liquid fertilizer every 4-6 weeks in spring and summer. Too much can make the plant grow weak and leggy. In fall and winter, skip the fertilizer—Peperomia Rosso doesn’t need it when it’s not actively growing. With these simple steps, your Peperomia Rosso plant will stay healthy and vibrant. Next, let’s learn how to propagate peperomia rosso and grow more plants for free! Peperomia Rosso Propagation: Growing More Plants for Free Want more Peperomia Rosso plants without spending a dime? Good news—you can grow new ones from cuttings! Peperomia Rosso propagation is simple and fun, even if you’re a beginner. I’ve done it many times, and it never gets old. Watching tiny roots appear feels like magic! The best methods? Leaf cuttings and stem cuttings. Both work well in water or soil. Water lets you see roots forming, while soil gives them a head start. Pick whichever method feels right for you! How to Propagate Peperomia Rosso in Water Take a cutting – Snip a healthy leaf with its stem (petiole). You can also use a short stem cutting with a few leaves attached. Place in water – Use a small glass or jar. The cut end should sit in the water, but the leaves should stay dry. Find a bright spot – Keep it in indirect light. Too much sun can dry it out. Change water weekly – Fresh water keeps bacteria away and helps roots grow. Wait for roots – In 2-4 weeks, tiny white roots will appear. Once they’re about an inch long, it’s time to plant! How to Propagate Peperomia Rosso in Soil Take a cutting – Just like with the water method, cut a healthy leaf with its stem or a short stem cutting. Let it dry – Let the cut end sit for a few hours to form a callus. This prevents rot. Plant in soil – Use light, well-draining soil (a mix of peat moss and perlite works great). Insert the cut end into the soil. Keep it moist – Water lightly, just enough to keep the soil damp but not soggy. Be patient – In 4-6 weeks, new roots will develop. Give it time! Pro Tips for Success Humidity helps! Cover the plant with a plastic bag or place it in a humid spot for faster rooting. Don’t overwater. Too much moisture can cause rot. Check that the top inch of soil is dry before watering. Choose the right season. Spring and summer are best for peperomia rosso propagation since the plant grows faster in warm weather. Common Problems & Solutions Even though Peperomia Rosso is an easy-care plant, it can sometimes run into trouble. If your peperomia rosso plant isn’t looking its best, don’t worry! I’ve had my fair share of plant struggles, and I know how frustrating it can be. Let’s go over some common issues and how to fix them. 1. Peperomia Rosso Yellow Leaves Why it happens: Overwatering (the most common cause!) Too much direct sunlight Nutrient deficiency How to fix it: Check the soil. If it feels soggy, let it dry out before watering again. Move the plant. If it’s in harsh direct sun, place it in bright, indirect light instead. Fertilize lightly. Use a diluted liquid fertilizer every 4-6 weeks in the growing season. 2. Drooping or Wilting Leaves Why it happens: Underwatering or overwatering